Automated Database Backups with Kamal
Intro
I wrote about my experience with Kamal last month and have since kicked off another project and successfully deployed to Hetzner with Kamal. These are small, personal projects of course, so very limited on terms of exercising scale, but equally they are things I’d typically be deploying to Heroku or Fly.io in the past, so deploying to my own servers is a real win!
I built a small app to help managing pitches, scopes and tasks following the Shape Up methodology, since I rolled this out at work and have not only been enjoying the process again, but also seeing lots of things that a simple webapp could make more efficient.
So, thanks to the incredible productivity I can get with Rails being a truly One Person Framework, I had something good enough to share after a long weekend coding.
The thought of other people adding data though made me panic! What happens if I lose the data?! Fine if it’s just me. Not fine if it’s anyone else!
Backups
Time to figure out backups! My prototype was also running on SQLite, which it totally fine for small projects like mine, but I’d not used before in a production context so my first task was to set up Postgres.
I found a few articles, this one from Stefan being fantastic, which I pretty much followed in entirety, but since there were a few steps I had to change, and S3 config that had to be wrestled through, I wanted to record my process here for future me (and maybe you) to refer to.
Lets Go!
The Basics
This guide is for Kamal deployments, backing up a Postgres database and archiving backups to and restoring from S3. If that’s you, then this should be helpful. If not, your milage may vary as they say.
Database Accessory
You should already have a database set up as what Kamal calls an “Accessory”, the configuration for which will be in config/deploy.yml. Mine looks like this. See my previous article for more details if needed.
accessories:
  database:
    image: postgres:16.2
    host: 10.0.0.3
    port: 5432:5432
    env:
      clear:
        POSTGRES_USER: postgres
        POSTGRES_DB: <add-your-database-name-here>
      secret:
        - POSTGRES_PASSWORD
    directories:
      - data:/var/lib/postgresql/data
Database Backup Accessory
The cool thing with this implementation is we’ll simply be defining another accessory that will spin up a container to manage the backups! In my case I’m running this on the web server (host: 10.0.0.2) but you can easily add a new dedicated server or VPS for this by just changing the host. Here’s my configuration which I’ll break down next:
db_backup:
  image: eeshugerman/postgres-backup-s3:16
  host: 10.0.0.2
  env:
    clear:
      SCHEDULE: "@daily"
      BACKUP_KEEP_DAYS: 7
      S3_REGION: eu-west-2
      S3_BUCKET: <add-your-s3-bucket-name-here>
      S3_PREFIX: backups
      POSTGRES_HOST: 10.0.0.3
      POSTGRES_DATABASE: <add-your-database-name-here>
      POSTGRES_USER: postgres
    secret:
      - POSTGRES_PASSWORD
      - S3_ACCESS_KEY_ID
      - S3_SECRET_ACCESS_KEY
db_backup
Note that we’re naming this accessory “db_backup”
image: eeshugerman/postgres-backup-s3:16
This is the docker image thats doing the backups for us. You can find the GitHub repo here which is basically a backup agent in a box.
One thing to note is :16 at the end of the image name should match the version of Postgres you’re using. In my case, 16!
host: 10.0.0.2
This is the server we want the image to be deployed to. As mentioned in my last article my servers are on private IPs that kamal accesses via a proxy but just make this the IP of your host.
env
Lastly we have a bunch of ENV vars, some in the clear, some secret as named. They’re all self explanatory, so just a case of adding your S3 region, bucket etc. In my case I set it to run @daily backups - which is just after midnight - and to keep 7 days of history.
Setting Up the S3 Bucket
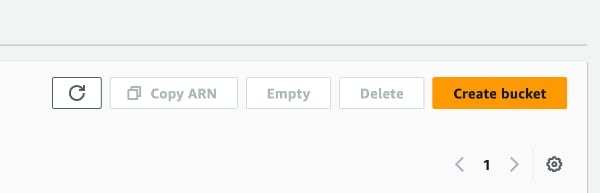
OK! So now we need to set up our S3 bucket to store the backups. I’m assuming you have an AWS account, but if not, sign up and go to https://s3.console.aws.amazon.com and click the “Create bucket” button.
This will summon up the following delightful form we need to complete to configure our bucket
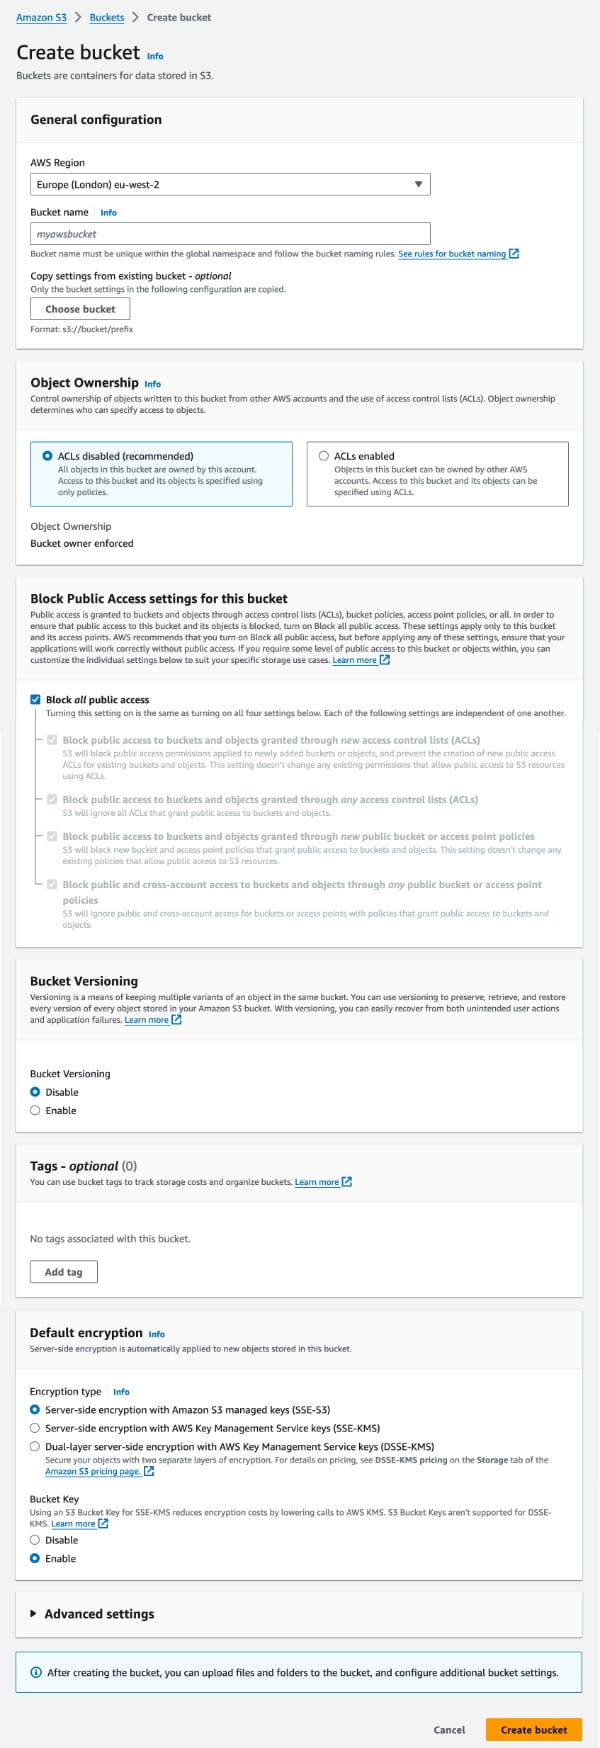
Without going in to all the details since there are explanations in the form - and countless pages of documentation on AWS - I’ll just note down the settings we need to get up and running.
- AWS Region - should be self explanatory. Make sure this matches your
deploy.ymlthough. - Bucket type - General purpose
- Bucket name - something that makes sense for your app. Again make sure you use the same in
deploy.yml. - Object ownership - ACL’s disabled
- Block Public Access - Block all public access
- Bucket Versioning - Disable. No need for this since we’re making nightly backups
The rest we can go with the defaults, so click “Create bucket”.
AWS Policy
Now we also need to create the Security Policy in S3 that defines what access we want to provide to the bucket. We want Kamal to be able to connect with read and write permissions so we can save and retrieve backups.
Visit the Policy page on AWS here https://console.aws.amazon.com/iam/home#/policies and click the “Create policy” button.
Where it says “Select Service” choose “S3” and you should see another lovely Amazon form below:
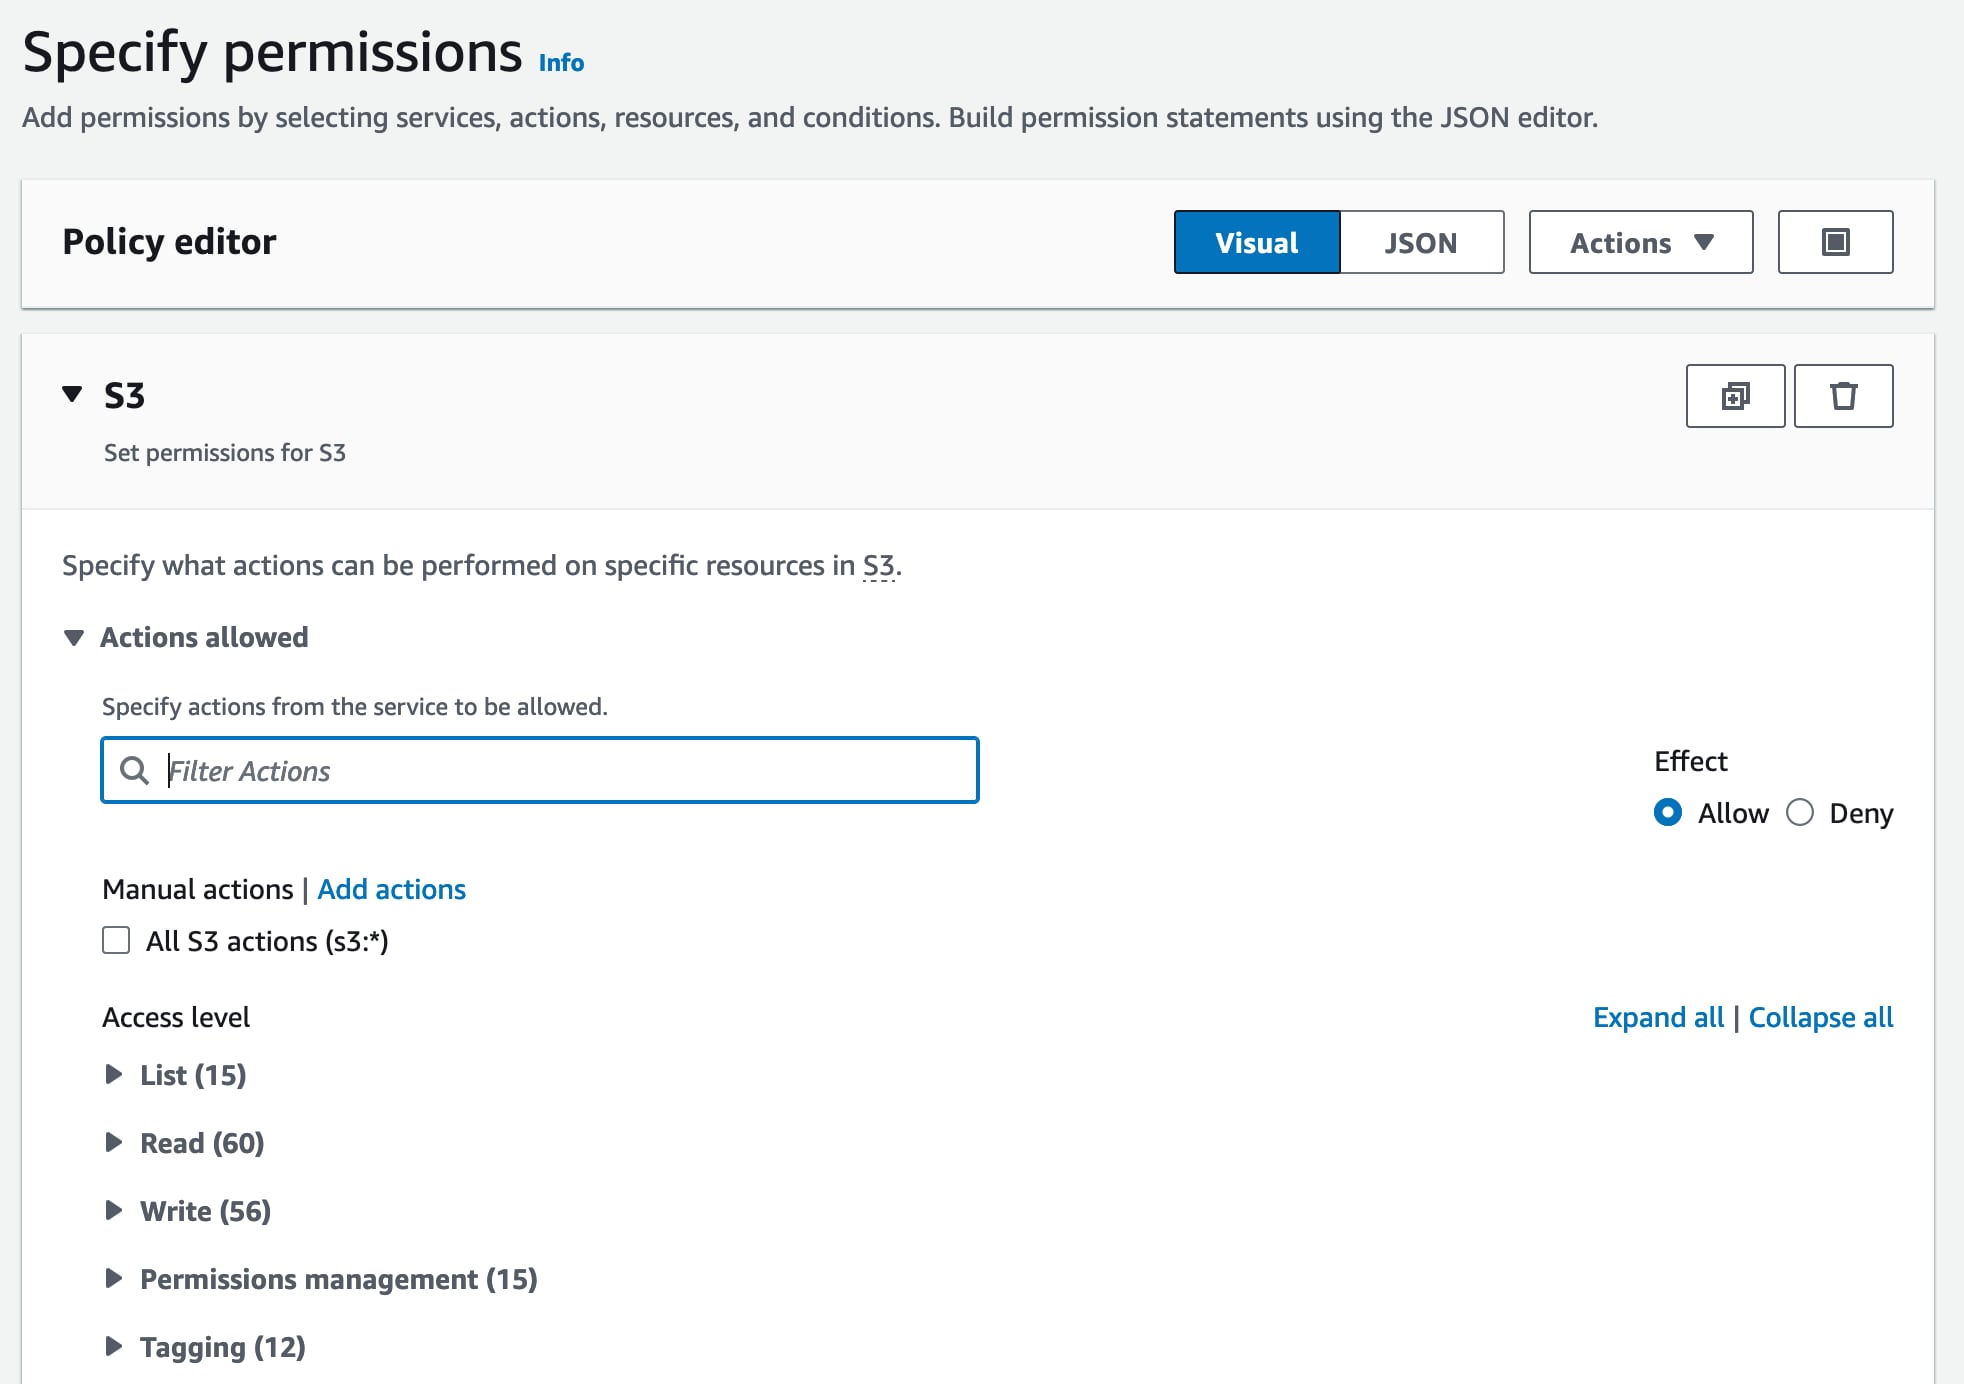
We need to allow our backup service to be able to save a backup to the bucket, to read them back, to delete them (as they rotate over 7 days) and also list the contents of the bucket.
In S3 policy parlance, this equates to the following:
GetObject
PutObject
DeleteObject
ListBucket
ListAllMyBuckets
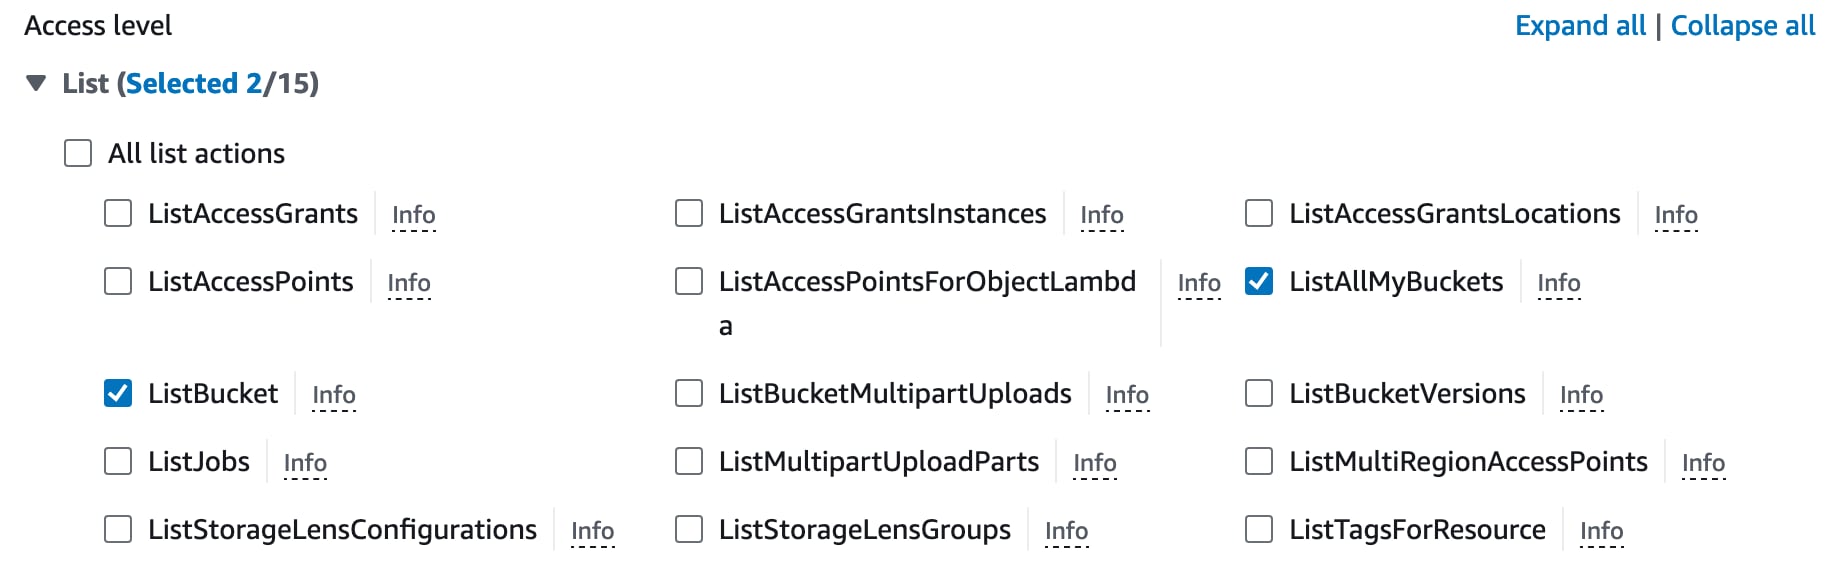
The UI is rather fiddly but for each of “List”, “Read” and “Write” sections you need to click the “>” icon to expand the details then check each corresponding checkbox. Here’s the “List” section for example. Do the same for the permissions above in each section.
Then at the bottom of the same form you should see a “Resources” section. This is where we specify which buckets this policy is giving access to. Click “Specific” here and then “Add ARNs” next to the “bucket” label.
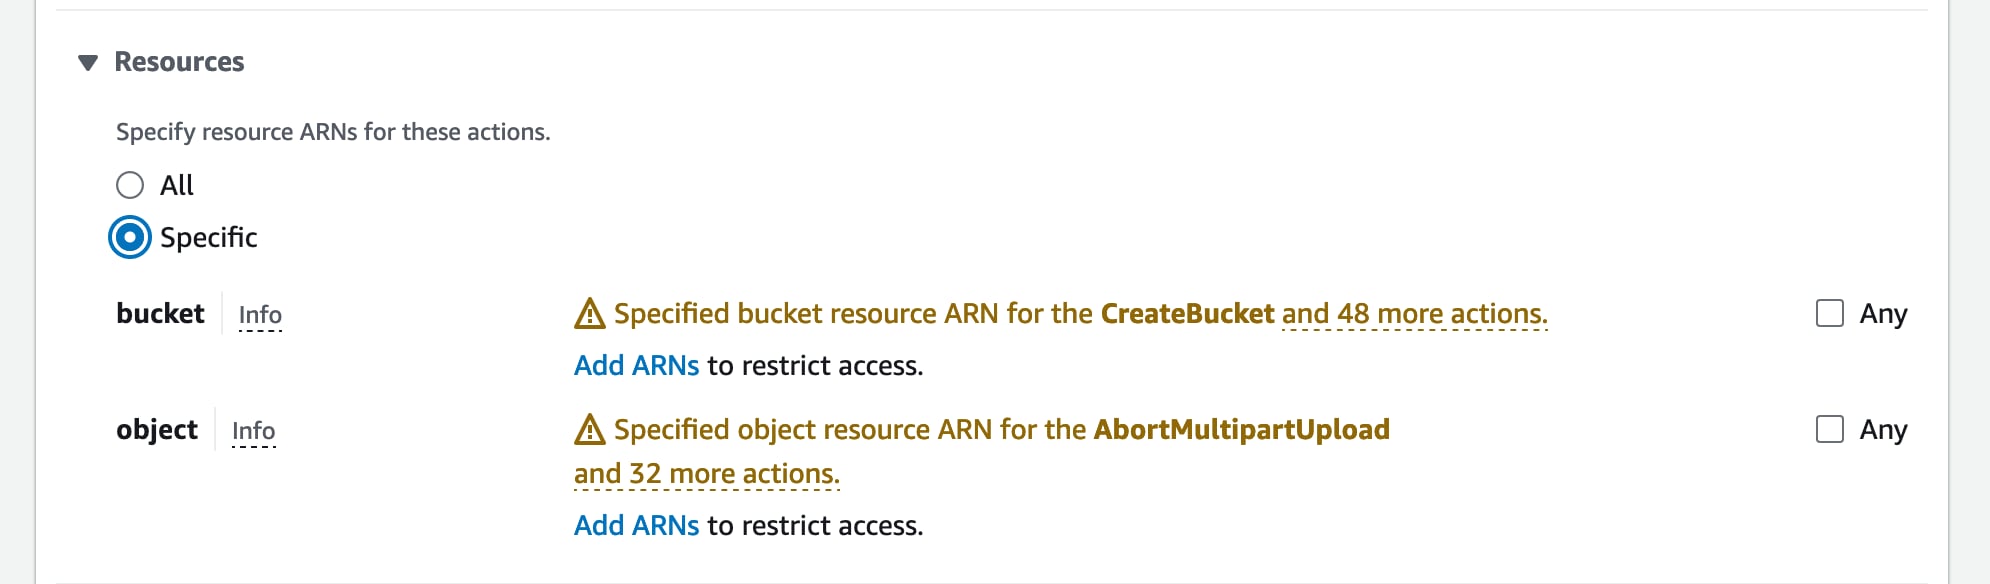
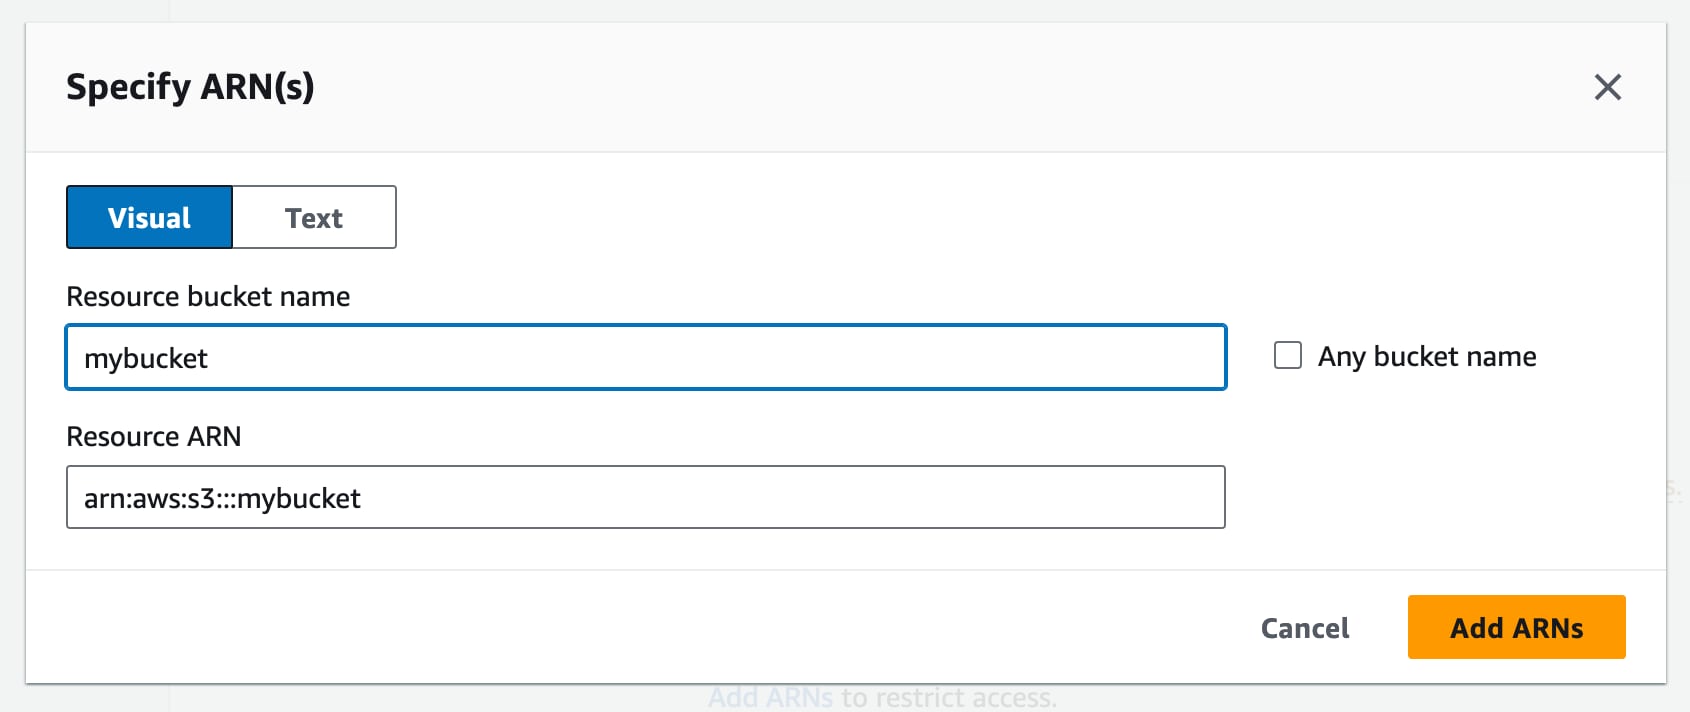
After clicking “Add ARNs” you’ll see a modal where you can enter the bucket name. Add your bucket name from above here and hit the “Add ARN” button. Also add an entry for your-bucket-name/* to give the same permissions to all the files in the bucket.
Now click “Next” on the main form and you’ll be asked to “Review and Create” the policy. Give it a meaningful name and then go ahead and click the “Create policy” button.
AWS User
Phew! If you’re still with me. Well done! We’re almost there. The last piece for AWS is we need to create an IAM user account. We’ll be using this to generate the credentials that our backup service will use to connect to S3.
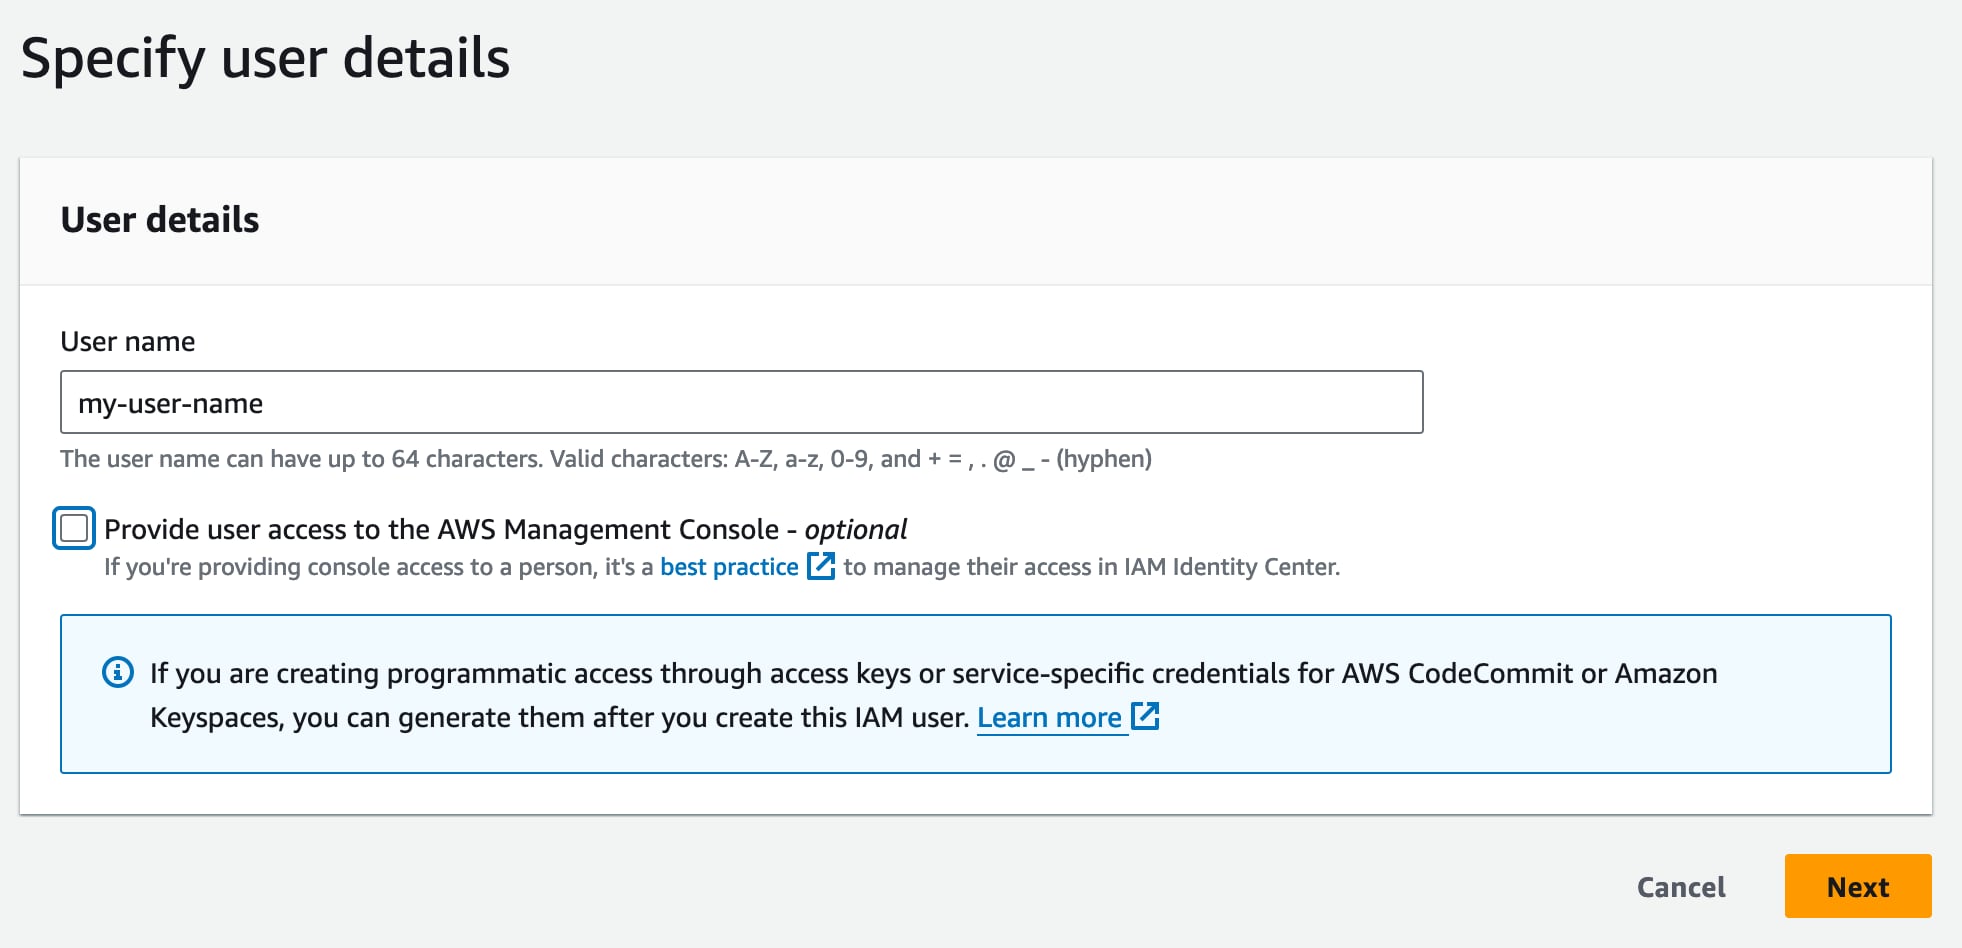
Go to console.aws.amazon.com/iam/home#/home and click “Users” in the menu on the left. Then click the “Create user” button.
That will summon up the form below where you should enter a user name that makes sense for the role. This user doesn’t need access to the AWS console, so leave that box unchecked and click “Next”.
On the next page, we will be attaching the security policy we made in the last step to this new user, effectively giving this user the permissions to access the bucket. Click the “Attach policies directly” option, then search for the policy name you created previously.
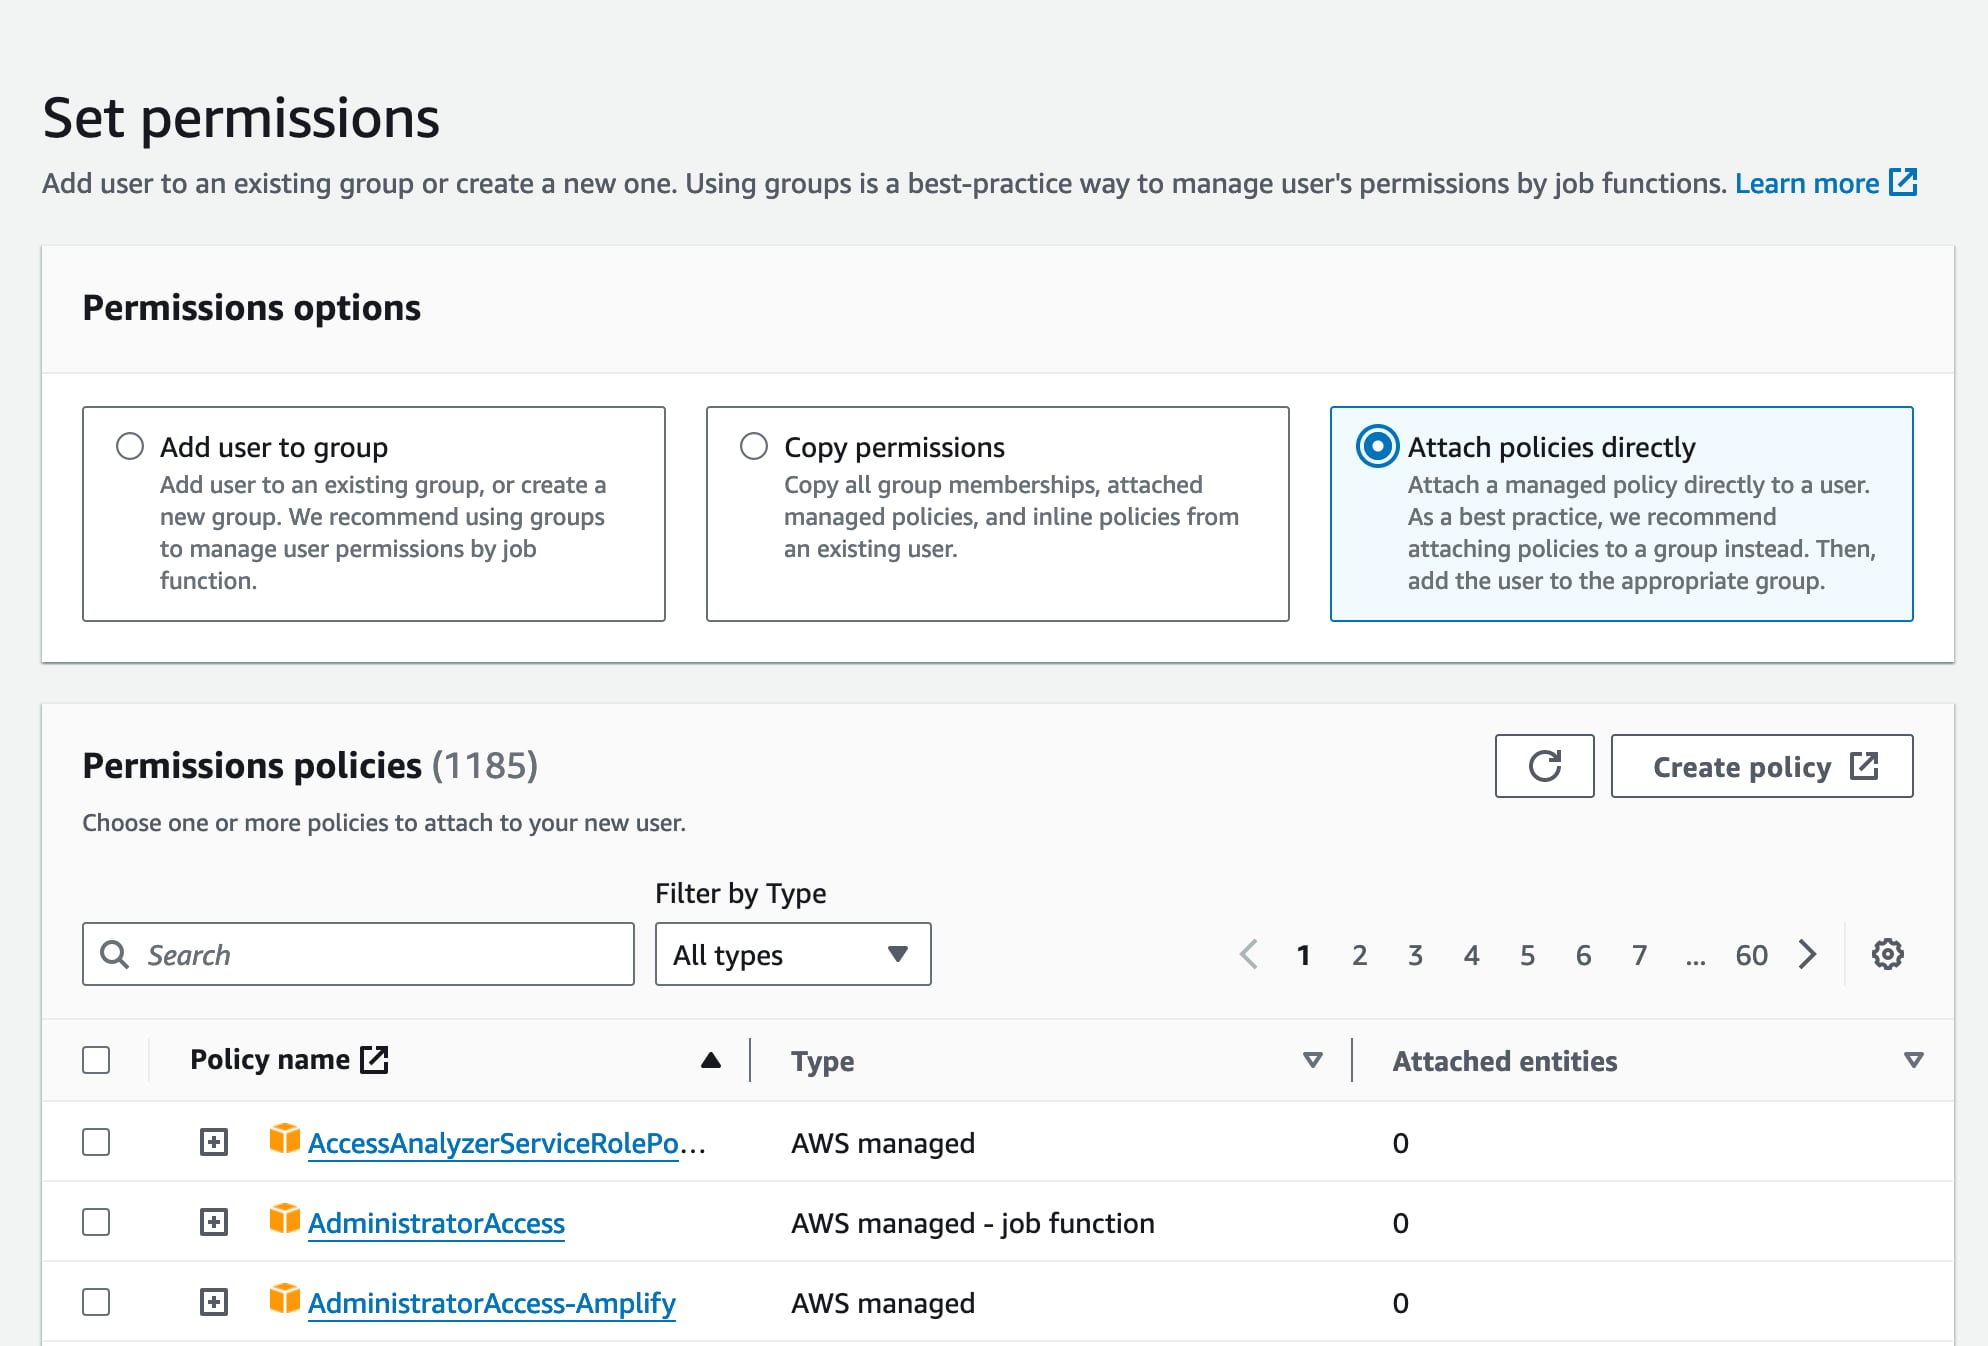
Check the checkbox next to your policy, click “Next” and then “Create user” on the next screen.
Now, finally, lets go to the user and get the security credentials. Visit https://console.aws.amazon.com/iam/home#/users and click on your newly created user name.
On the user page, click the “Security credentials” tab, scroll down to “Access Keys” and click the “Create access key” button.
Choose the “Application running outside of AWS” option, click next, then “Next”. You should now be on the “Retrieve access key” page below:

Before you leave this page, you need to copy the Access key and Secret access key, or download the CSV, and put somewhere safe as you will not be able to get them after leaving the page!
Configure Kamal to connect to S3
Now we need to give our backup service access to S3 to save and retrieve our backups using the credentials we just saved in the previous step via the S3_ACCESS_KEY_ID and S3_SECRET_ACCESS_KEY environment variables that we referred to in the Database Backup Accessory env secrets.
So, edit your .env file and append the credentials from the last step
S3_ACCESS_KEY_ID=AJIA......
S3_SECRET_ACCESS_KEY=Bw47......
Manual Backup
OK! Now we’re almost there! First we need to boot our new accessory
kamal accessory boot db_backup
and check the status with
kamal accessory details db_backup
You should now be able to run a manual backup by running the backup script on the container:
kamal accessory exec db_backup "sh backup.sh"
Simple as that! If you now head over to AWS and check your S3 bucket, all being well, you should have a nice new database backup file in there.
Restoring a Backup
To restore - and be VERY CAREFUL here. VERY! This operation will drop your database and reload from the backup so best set up a test environment or at least not be too worried if you lose the data. You can also download the backup and load it locally to get some confidence, and once you’ve run this once or twice you can be more relaxed.
kamal accessory exec db_backup "sh restore.sh"
Scheduled Backups
This is a trick section. There’s nothing to do! You already added SCHEDULE and BACKUP_KEEP_DAYS in the accessory configuration so your automated backup should simply run to that schedule. Make sure to check after you expect it to have run just in case!
Wrapping up
I almost didn’t write this post as I thought it was too trivial. Having just run through it to test, I realised there was a ton of detail I’d forgotten. Future me thanks me again.
Don’t hesitate to drop me a note, or send corrections, via twitter or any other channels listed here